Stage Lighting 101: Core Concepts Explained
A complete beginner guide for theatre, events & entertainment students in India
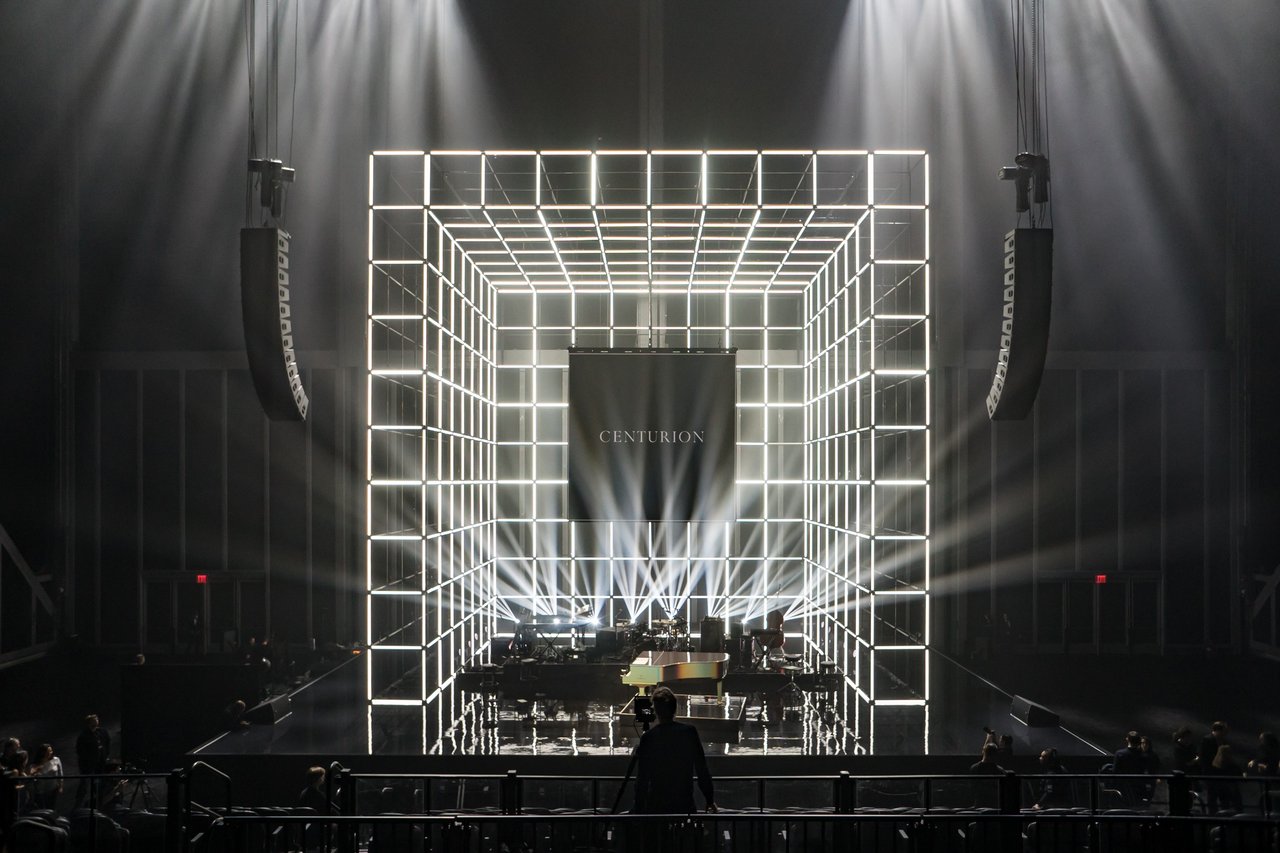
Lights. Stage. Action — But Wait, How Does the Lighting Actually Work?
Picture this: you’re standing backstage at your first live event. The performer walks out, the music swells — and then, boom, a perfectly timed wash of amber light floods the stage. The crowd reacts. The atmosphere shifts. You feel something.
Now here’s the question I want you to sit with: did the performer create that moment alone? Not a chance. It was the lighting designer — the person nobody ever applauds — who built that emotional arc with nothing but fixtures, cables, and a console.
Welcome to Stage Lighting 101. Whether you’re an event management student, just joined a theatre tech crew, or simply curious about what those mysterious lights hanging above the stage actually do — you’re in the right place. I’m going to walk you through the core concepts in a way that actually sticks, without burying you in technical jargon.
India’s live events industry is booming. From college fests in Pune to corporate galas in Hyderabad to fringe theatre in Chennai — lighting design basics have never been more relevant for newcomers. So let’s get into it.
Table of Contents
01. The Four Elements of Stage Lighting — intensity, colour, position, movement
02. Know Your Fixtures — PAR cans, Fresnels, ellipsoids and more
03. Front, Back, and Side Lighting — how to position for balanced coverage
04. Three-Point Lighting on Stage — key, fill, and back light
05. The McCandless Method — the golden formula for front lighting
06. Layering Lights for Depth and Mood — why one light is never enough
07. Stage Wash Lighting — even illumination from scratch
08. Colour, Gels, and Temperature — the art of coloured light
09. Gobos and Effects — pattern, texture, magic
10. DMX Control Basics — talking to your lights digitally
11. Lighting Plots and Cue Sheets — documenting your design
12. Safety Rules for Rigging and Power — because safety is not optional
01 — The Four Elements of Stage Lighting
Here’s your foundation. Every lighting design — from the simplest school play to the most elaborate concert — is built on just four elements. Understand these, and everything else starts to make sense.
| Element | What It Controls | Practical Example |
| Intensity | How bright or dim a light is | Dimming lights to signal end of a scene |
| Colour | The hue and warmth of the light | Warm amber for a romantic scene |
| Position | Where the light comes from (angle, direction) | Back light separating performer from backdrop |
| Movement | Changes in any of the above over time | A slow fade to black at curtain call |
Think of these four as your toolkit. A great lighting designer doesn’t just set up lights and walk away — they orchestrate all four elements together, in real time, to serve the story on stage.
A quick tip for beginners: start with intensity first. If your performers aren’t visible, nothing else matters. Once visibility is sorted, layer in colour. Then worry about position. Movement — meaning cue sequences and timed fades — comes last.
02 — Know Your Fixtures: Essential Stage Light Types
Every fixture has a personality. And knowing which one to reach for is half the battle in basic stage lighting.
| Fixture | Beam Type | Best Use | Budget (Rental in India) |
| PAR Can | Fixed, broad beam | Colour wash, general fill | Rs. 200–500/day |
| Fresnel | Soft-edged, adjustable | Face lighting, portrait | Rs. 300–600/day |
| Ellipsoidal (Leko/Profile) | Sharp-edged, focusable | Spotlighting, gobo projection | Rs. 500–1200/day |
| LED Par/Wash | Colour-mixing, broad | Modern wash, dynamic colour | Rs. 400–1200/day |
| Moving Head (Beam/Spot) | Automated, pan/tilt | Concerts, large events | Rs. 800–5000/day |
| Followspot | Manual tracking spotlight | Theatre, speeches, solos | Rs. 1000–6000/day |
For beginners working on a stage lighting 101 production — say a college play or a corporate panel event — you’ll mostly deal with PAR cans, Fresnels, and maybe some LED washes. Master those three and you’re already set.
03 — Front, Back, and Side Lighting: Positioning for Balanced Coverage
Here’s one thing that separates amateur setups from professional ones: light position. It’s not just about having enough lights — it’s about where they’re coming from.
Front Lighting
Front lights come from in front of the performer, usually mounted on a truss or bar above the audience sightline. They illuminate faces, making performers clearly visible. Always set up front lighting first — without it, you’re just putting a silhouette on stage.
Back Lighting
Back lights sit behind the performer, pointing toward the audience. They create a beautiful rim of light that separates the performer from the background — what photographers call the separation light. Add a back light to any basic setup and watch how instantly more professional it looks.
Side Lighting
Side lights come from the wings (the sides of the stage). They add texture and dimension, especially for dance. If you’ve ever watched a Bharatanatyam performance or a contemporary dance show and thought the lighting looked stunning — side lighting was doing a lot of that heavy lifting.
A complete front back side lighting stage setup creates three-dimensional space from a flat stage. It’s foundational to everything in stage lighting principles.
04 — Three-Point Lighting on Stage: The Classic Triangle
If there’s one technique you absolutely must know, it’s three-point lighting for theatre. Originally a film and photography concept, it translates beautifully to stage — and it’s the most reliable setup in the game.
| Light | Position | Function | Angle Tip |
| Key Light | Front-side, 45° horizontal/vertical | Primary source — most of the illumination | Slight off-centre feels natural |
| Fill Light | Opposite front-side from key | Softens harsh shadows from key | Lower intensity than key (60–70%) |
| Back Light | Behind performer, elevated | Adds depth, separation from backdrop | Point slightly downward |
Once you nail this three-light setup, you’ll start to see it everywhere — music videos, TV interviews, even the lighting on your favourite anchor on news channels. It’s the industry standard for a reason: it works, every time, on every performer.
05 — The McCandless Method: A Formula That Changed Theatre Lighting
Here’s a name you’ll hear a lot in theatre lighting circles: Stanley McCandless. This American professor literally wrote the book on stage lighting back in 1932 — and his method is still taught in drama schools across India and the world.
The McCandless lighting method is elegantly simple:
- Two front lights hit the performer from opposite 45° angles — one warm, one cool
- Together, they create even illumination with colour balance and natural-looking shadow
- The warm side (usually amber/straw) represents warmth and life; the cool side (blue/lavender) adds depth
- A back light adds the third dimension
The genius of McCandless was recognising that flat, white front light looked terrible on performers — it washed out faces and flattened depth. By splitting the front light into two complementary colours from two angles, you get visibility and dimensionality. It’s the difference between looking like a documentary and looking like a performance.
In India, especially in classical theatre, drama schools in cities like Vadodara, Kolkata, and Thiruvananthapuram still use the McCandless approach as a teaching foundation. It’s that enduring.
06 — Why Layering Lights Creates Depth and Mood
I’ll be direct with you: one light is not a lighting design. It’s just a light. The magic — the real stage lighting principles that make an audience feel something — comes from layering.
Think of it like a photograph. A flat, head-on shot looks fine. But add a backlight, a rim glow, a coloured accent — suddenly there’s dimension, intrigue, story. Lighting works exactly the same way.
Here’s how layers work in practice:
- Base wash — your foundation of even, neutral light across the whole stage
- Key and fill — three-point lighting on your main performance area
- Colour accents — gels or LED colour to set mood or mark a scene change
- Special effects — gobos, moving lights, followspots for specific moments
- Top/back light — depth and separation on every important position
Every layer adds information. The audience processes it subconsciously — they don’t think “oh, nice back light” — they simply feel that the scene is rich and alive. Take away the layers and they feel something is missing, even if they can’t name it.
07 — Stage Wash Lighting: Even Illumination From Scratch
A stage wash is exactly what it sounds like — a wash of light that evenly covers the entire performance area. It’s your starting point for almost any stage lighting 101 setup.
For beginners, here’s how to build a basic wash:
- Plan coverage zones: Divide your stage into sections — upstage (back), centre stage, downstage (front)
- Use multiple fixtures: No single light covers an entire stage evenly. Use 3–5 PAR cans or Fresnels per zone
- Overlap beams: Aim each fixture so its beam overlaps with its neighbours by about 30%. This eliminates dark spots
- Check from the audience: Always walk to the front row to see what the audience sees before finalising your wash
- Use colour sparingly: A wash can be neutral white or tinted — but tinted washes affect skin tones dramatically, so test first
A well-executed stage wash lighting tutorial outcome is invisible — meaning nobody notices the lighting because it’s doing its job perfectly. That’s the goal.
08 — Colour, Gels, and Colour Temperature in Stage Lighting
Colour is where stage lighting stops being technical and starts being artistic. And the stage lighting color and gels section of any 101 guide deserves serious attention.
Understanding Colour Temperature
Colour temperature is measured in Kelvin (K). The lower the number, the warmer and more orange the light. The higher, the cooler and bluer.
| Temperature Range | Colour Appearance | Stage Use |
| 2700K – 3200K | Warm orange/amber | Intimate scenes, sunsets, fire effects |
| 4000K – 4500K | Neutral white | General stage wash, news/corporate events |
| 5600K – 6500K | Cool daylight blue | Clinical, cold, or modern aesthetic |
| Custom (gel) | Any colour you choose | Mood lighting, scene changes, effects |
Working With Gels
Gels are heat-resistant coloured sheets that attach to fixtures and change the light output colour. Some favourite combinations for Indian stage setups:
- Deep Amber + Steel Blue: Classic McCandless warm/cool split
- No Colour Straw + Lavender: Softer, more flattering skin tones
- Primary Red + Deep Blue: High contrast, dramatic productions
- Bastard Amber + Lee 201: The most forgiving combo for mixed skin tones under tungsten
Gel sheets from manufacturers like Rosco and Lee are available through AV suppliers in Mumbai, Delhi, and Bangalore, typically at Rs. 100–300 per sheet. A single sheet lasts multiple shows if handled well.
09 — Gobos and Effects: Adding Pattern and Texture
Once you have your wash, your three-point rig, and your gel colours sorted — it’s time to have some fun. Enter gobos and gels for stage.
A gobo is a metal (or sometimes glass) template that fits inside an ellipsoidal/profile fixture and projects a pattern onto the stage or backdrop. Think dappled sunlight through leaves, gothic stone window frames, geometric patterns, or abstract textures.
Here’s what you can create with gobos:
- Forest/natural scenes — leaf breakup patterns cast across the stage floor
- Urban settings — window or brick patterns projected on cyclorama
- Abstract drama — geometric or star patterns for dance and experimental theatre
- Time and place — a clock face, a doorway, an archway projecting to set a location
Gobo holders and templates for standard ETC Source Four / Profile fixtures cost Rs. 300–700 each. Glass gobos with colour are more expensive (Rs. 1,500–4,000) but project finer detail. For beginners, start with simple steel gobos — the effect-to-cost ratio is unbeatable.
10 — DMX Control Basics: Talking to Your Lights Digitally
We touched on DMX in our first blog, but stage lighting 101 demands a deeper look — because understanding DMX is the bridge between just hanging lights and actually controlling a show.
How DMX Works
DMX (Digital Multiplex) is a communication protocol — a standardised digital language. When you move a fader on your console, the board sends a DMX signal down a cable to your fixtures telling them what to do. One DMX universe handles 512 channels. Each channel = one controllable parameter.
| Fixture Type | Channels Required | What Gets Controlled |
| Dimmable PAR (basic) | 1 channel | Intensity only |
| LED PAR (RGB) | 3 channels | Red, green, blue intensity |
| LED PAR (RGBW) | 4 channels | Red, green, blue, white |
| Moving Head (basic) | 8–16 channels | Pan, tilt, intensity, colour, gobo |
| Moving Head (full) | 16–32+ channels | All of the above + speed, effects, strobe |
Setting DMX Addresses
Every fixture on your rig needs a unique DMX address. If two fixtures share the same address, they behave identically — sometimes useful, often not. You set the address directly on the fixture using DIP switches or a menu. Most beginner consoles auto-patch fixtures, but understanding manual addressing will save you hours of troubleshooting.
Budget DMX Options for Indian Students
- Entry-level USB DMX interface (connects laptop to lights): Rs. 1,500–3,000
- Basic 12–24 channel standalone controller: Rs. 2,500–5,000
- Free software: QLC+ (cross-platform) — excellent for learning
- Mid-range: Chamsys MagicQ PC software (free, professional-grade)
11 — Lighting Plots and Cue Sheets: Documenting Your Design
A lighting plot is a top-down technical drawing of your stage that shows every fixture’s position, type, circuit number, DMX address, and gel colour. A cue sheet is the ordered list of lighting states you’ll execute during the show.
Why bother creating these? Two reasons:
- Reproducibility: You can recreate the exact same show tomorrow, or hand it off to another operator
- Communication: Designers, directors, and operators all read from the same document — no confusion, no surprises
Creating Your First Lighting Plot
- Draw or print a top-view floor plan of your venue
- Mark hanging positions (truss, pipes, booms, floor stands)
- Draw each fixture at its position using standard theatrical symbols
- Label each fixture: number, type, DMX address, gel, circuit
- Include a legend and compass rose (which direction is upstage)
Creating Your First Cue Sheet
| Cue # | Description | Trigger | Action |
| Q1 | House lights to half | 10 min before show | Channel 1 at 50% |
| Q2 | House out, stage wash in | 5 sec before curtain | Ch1 out, Ch2–8 to 80% |
| Q3 | Scene 1 special — spot SR | Actor’s first line | Ch15 at 100%, colour amber |
| Q4 | Blackout | End of Act 1 | All channels to 0 |
| Q5 | Interval — house up | Stage manager go | Ch1 to full (100%) |
Even a simple lighting cue sheet basics document like this transforms a stressful live show into a manageable sequence. You’re no longer reacting — you’re executing a plan.
12 — Safety Rules for Stage Rigging and Power
I’d be failing you as a guide if I wrapped up stage lighting 101 without talking about safety. Electrical and rigging hazards are real — and in India’s fast-paced event industry, they’re often the first thing people cut corners on. Don’t.
Electrical Safety
- Never exceed the wattage rating on your dimmers or distribution boards
- Use properly rated cables — don’t substitute household extension cords
- Always have a qualified electrician sign off on power distribution for events above 5kW
- Keep dimmers and power units away from areas with water (dew, rain, wet stages)
- Label all circuits before the show — unlabelled circuits get switched off accidentally
Rigging Safety
- Safety cables are mandatory on every hanging fixture — if a clamp slips, the safety bond catches the light
- Use rated clamps (load-tested steel C-clamps or hook clamps) — never improvise with cable ties or rope
- Do a rig check before every show: inspect clamps, safety bonds, and cable runs for wear
- Wear a hard hat and safety harness when working at height — this applies to venues in Mumbai, Delhi, or anywhere else
- Follow the “shout below” protocol: always call out loud before dropping anything from a rig
Power and Load Calculations
Quick formula for checking electrical load:
Watts ÷ Volts = Amps | Example: 2000W ÷ 230V = 8.7A (use a 10A circuit minimum)
In India, most theatrical venues run on 230V AC. Plan your loads before show day, not during.
Wrapping Up: You Now Know More Than Most
Let’s be honest — most people who “handle the lights” at college productions or small events in India are figuring it out as they go. Which is fine. But now you have a foundation. You know the four elements. You understand fixtures. You can talk McCandless, three-point lighting, DMX addressing, and cue sheets — and actually know what those words mean.
That’s not nothing. That’s the vocabulary of a discipline that careers are built on.
The next step is simple: Stop reading and start rigging: Kickstart your career in Stage Light Design program.
You won’t just watch the show anymore. You’ll read it.
Continue your learning: Check out — Stage Lighting for Beginners — for a broader introduction. More articles on advanced DMX programming, moving lights, and lighting for Indian classical performances coming soon.